Showing posts with label projects. Show all posts

Monday, April 16, 2012

Installation Butterflies.

{a simple valence in F. Schumacher's "Alexandria Vine" bridges the gap between built-ins}


{coordinating pillows add life and zip to the sofa}
I have a favorite part of the design process, and it often times is the most anxiety ridden. Installation. I have faith in myself that I crossed all my T's and dotted all my I's but things sometimes go amiss and you just have take a deep breath and take it as it comes. I've been working with a client on freshening up her family room space and the first part of phase one was delivered and installed last week. I'm thrilled with the result so far! I can't wait for the next phases to be complete for the whole picture. I feel like sometimes the smallest details can create the biggest impact. What do you think?
{perhaps my favorite piece yet, the "Serengeti" ottoman completely transformed an existing piece with a fresh face}

Friday, February 17, 2012

It's all about the details.

 Some say the devil is in the details. I think those little pieces and parts can make or break a room. Without thought and careful planning these seemingly small elements create the polish that makes the room feel complete. Here are a few of my favorite details from recent projects!
 
{Photo taken by Kate Nisbet Designs}
By replacing a large traditional gold framed portrait with a grouping of four collected-while-traveling Asian fans simply framed in black and white makes a big impact above a chest in the dining room. The small amount of negative space that creates a cross shape allows the vibrant wall color to peek through and establishes the illusion that the frames are identical in size, when they are all just a teeny bit different. The dark frames hung in a grouping was "just the thing" the wall was asking for!

{Photo taken by Kate Nisbet Designs}
 Tailored "outside the box" flat pleat silk window panels with a teeny button detail perfectly frame the window & complete the French country feel of this dining room.

{Photo by Kate Nisbet Designs}
On the topic of tailoring, I'm a stickler. When cushions & pillows are perfectly crafted, they can take an area of hard surfaces, like this built in window seat, and make it cozy, warm, & inviting. By mixing pattern & texture within a monochromatic neutral color scheme, I added a little oomph to an often ignored space!

What is one of your favorite details you've seen recently?

Monday, January 23, 2012

a tropical getaway on your tabletop.

 Me: "It's so cold and misty today!"

Husband: "It's January."

Me: "Oh, right."

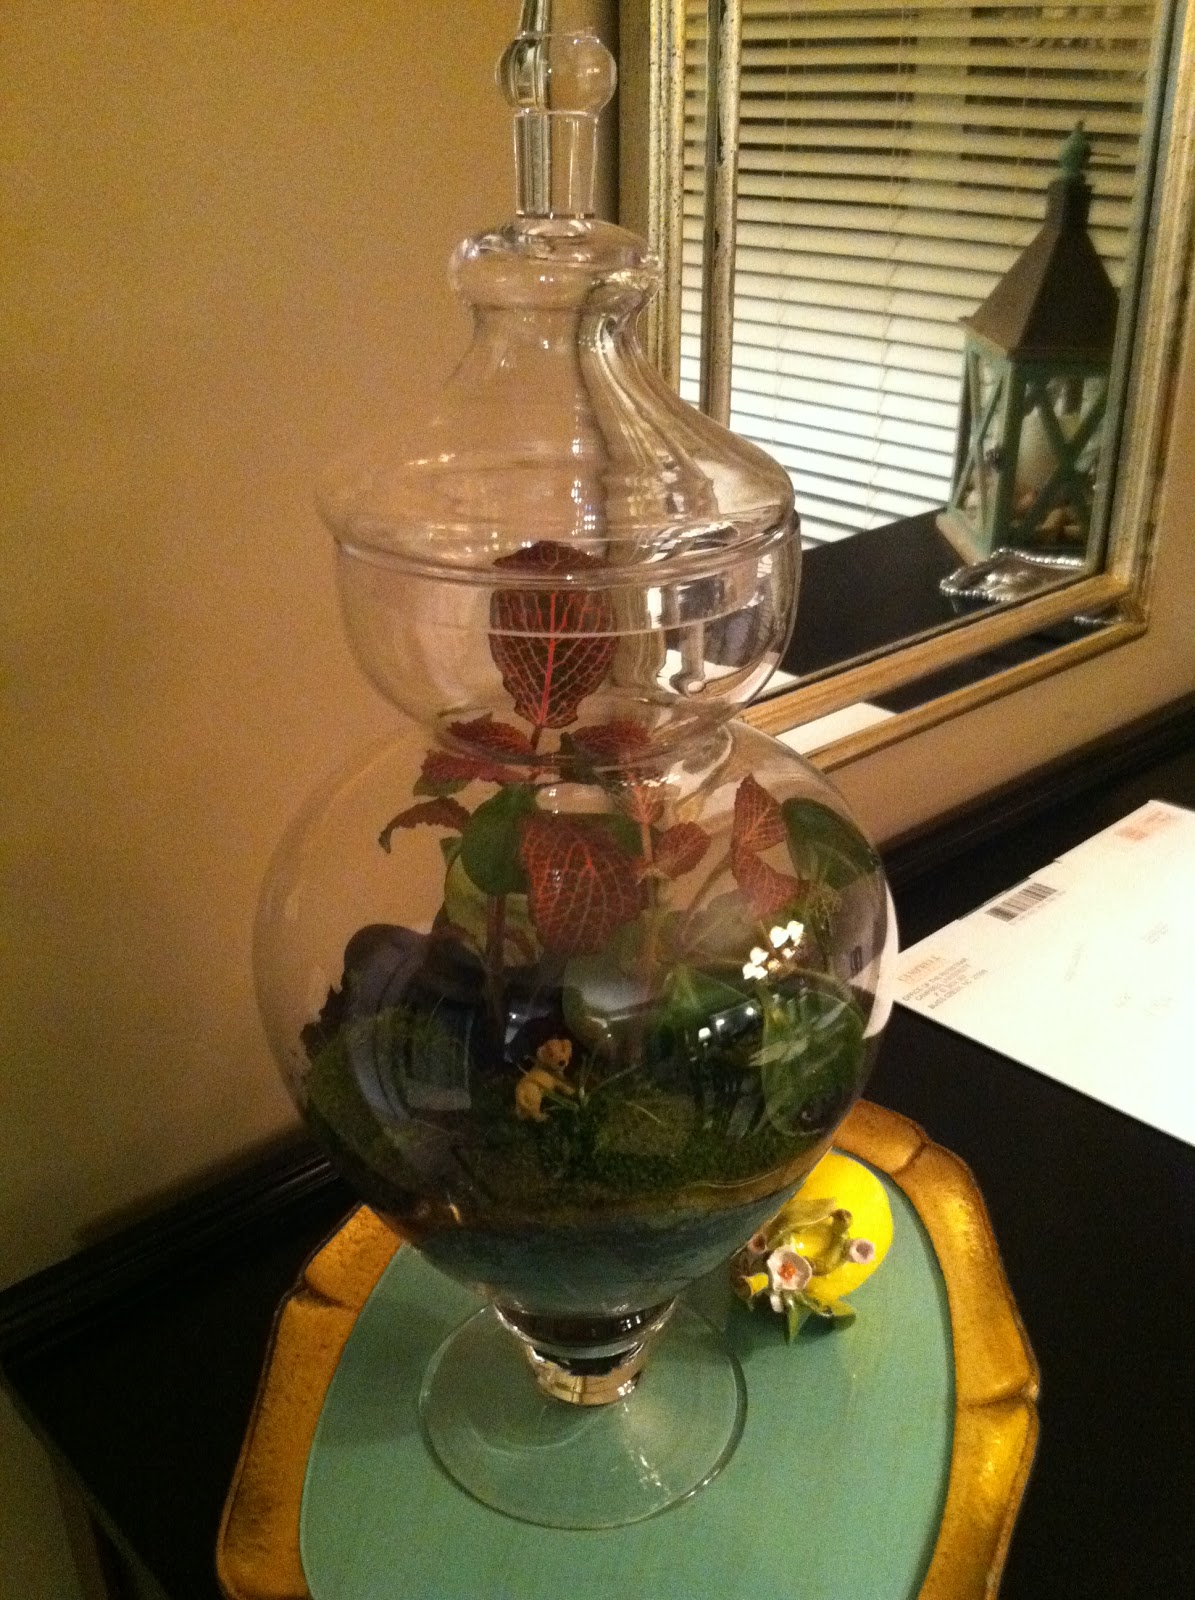
We've had a unseasonably mild winter thus far in NC with many a day where my coat can be left in the closet. We'll have a day or two of a cold snap, then the temperature will quickly rebound and hit the highs of the weather roller coaster. Despite the lack of winter bundling and frozen stuff, it's still easy to get caught up with wintertime blues. Little "happy projects" help keep my spirits up. The act of creating something out of a random assortment of supplies really leads to a sense of accomplishment, and can add a little pep in your step! My latest creation? A terrarium. A tiny tropical rain forest to sit atop a table.

Here's what you'll need:

  • A glass container of any size. I used an apothecary jar I've had sitting around the house.
  • Rocks, pebbles, etc. This aids in drainage. You can hunt them out if you have a rocky driveway or purchase a bag at Lowes for about $4
  • Charcoal. You can find this at a garden center or pet store. We happened to have some "competition" charcoal sans all the chemicals of your grocery store version so I crushed and used that.
  • Plants. I picked up one house plant at an estate sale this weekend and bought one at Lowes. Be sure you choose a plant that works with the placement of your terrarium in terms of lighting. I went for low light versions.
  • Moss. You can forage this if you live in a mossy climate, or can always turn to the great interwebs.
  • Spoon or other digging device & a spray bottle for watering
 1. Place a layer of rocks in the bottom of your container.

 2. Sprinkle a layer of charcoal on top of your rocks. This is messy. You don't need a lot, just cover about 1/2". This helps prevent stagnation and filters the water.
 3. Add 2" - 3" of potting soil. 

 4. Now the fun part, add the plants!

 5. After the plants went in I decided I really wanted some moss. Pete and I went foraging and found a nice little patch to scoop up. Pat the moss into the soil, then water all of your new plantings.
 
 The finished product! I added a little critter I had around the house. I think I'll keep an eye out for a tiny gnome to add to the party. Keep an eye on it and make sure it stays damp, water a couple times a week or so. Then you are all set to enjoy a tropical oasis on your tabletop!

Friday, January 20, 2012

A day in the life.


If there is one quality in an interior designer that I think is most important, beside being super creative & able to stay in a budget, is the ability to multi-task. This job takes me to all sorts of places and spaces in any given day and I love it. Click on the collage above for a little snippet of my day! I've been to stone yards to search for the perfect Soapstone, Marble, & Granites ... I've installed a tailored and elegant silk drapery panels in a dining room...I'm researching this classic sofa for a friend, and have been spending time in the trade showrooms finding the perfect soft goods to cozy up a clients family room ... I've even hit some of my favorite shops to pull together a welcoming vignette in an office. 

I wonder where today will take me?

Friday, January 13, 2012

Pretty in Pink Honeysuckle.

I love breathing new life into a piece of furniture with history. This particular classically feminine chair happened to belong to a client's favorite grandmother. I selected a punchy Tapestria fabric to update and refresh the piece. Upon seeing is yesterday I said, "When I pick a fabric for a piece, I know it's going to look great in my head, but it is SO MUCH BETTER in real life!"

Are you aching to refresh a piece with history? I'm happy to e-consult with fabric options! 

Happy Friday! Any big plans or projects for the weekend?

Thursday, January 5, 2012

You want to take subway tile and run it how? | A Herringbone Backsplash Story

I know my husband loves me when he didn't even hesitate when I popped up with a weekend warrior DIY project that involved taking perfectly simple rectangular subway tile and making it zig & zag. The project took a little longer than I expected, but was well worth it in the end! After a trip or 2 to Lowes & our favorite local hardware stores, here's the supply list I compiled for the Herringbone Subway Tile Back Splash:

  • 3x6 subway tile + applicable rounded edge bullnose
  • Brown craft paper + masking tape
  • A Sharpie, pencil, + "grease monkey" aka grease pencil
  • Mastic or thinset to stick the tile to the wall
  • Saw with a diamond blade
  • Straight Edge + metal square
  • Tile spacers
  • Grout + Caulk | I liked the pre-mixed stuff that was already sealed and came in a bucket from Lowes. No mixing required. Think Betty Crocker's frosting in a can.
  • Float, Pallet, Spreader | To spread the grout. My inner baker kept calling it a spatula.
  • A bundle of patience + a bottle of good wine, for when you are done and super exhausted
  • Big sponge, lots of "junk" towels

Step 1: Procure above list.
Pete enjoys visiting our local hardware store. I enjoyed browsing the fabulous color selection of duct tape researching the best diamond edge saw blade for our job. Speaking of saws, my interwebs research found a place that said you could make easy cuts with a dremel tool attachment that cuts tile. Don't trust them. The dremel is GREAT for making small cuts around outlets + switches, but nosomuch for making straight cuts everywhere else.


Step 2: MAKE A TEMPLATE.
I cannot stress how important this is. We did really well on the whole template thing on wall one. Then I mistakenly thought we were old pros and by wall 2 things got a little wanky.


Step 3: Make your cuts
After consulting with the lad at the hardware store we decided since we were using the very thin cheapy subway tile that we didn't need to rent a wet saw. Please know that most tile installation projects do require this for clean cuts & keeping the blade happy.

Supervisor Pete reminds you to always wear safety goggles when working with a saw.

Thomas made cuts from the lines on the tile. We placed the cut tile back on the template (photo above) just to make sure it fit before "frosting" the wall and adhering the tile. Be sure to use your tile spacers to ensure you have even grout lines, particularly if you are using a grout with high contrast to your tile like we did. Repeat the layout-cut-adhere process as many times as necessary. Thomas cut and I pasted, pretty much all day Saturday until we decided that the saw might be annoying the neighbors and we needed a break. Most mastics require an overnight cure time, so be sure to read the back of your container.

I'm sorry I didn't snap any photos of the grouting process ... it was incredibly messy! Once the tile is on the wall and properly cured the grouting begins. You can remove the little plastic spacers at this time. It is important to push and pull the grout over every surface to fill in all the spaces. Wipe excess off with the sponge that is not too wet, this takes a while. Caulk edges if necessary. The instructions on the back of the bucket were quite helpful as were some youtube videos.


The final step is pouring yourself a good glass of wine and reveling in your DIY accomplishment.


White subway tile is a great inexpensive option to add a big style punch to your kitchen. It's a classic yet fresh option, and a great first tile project to get your feet wet with.

Wednesday, January 4, 2012

Seeing Spots.

I fancy spots of all kinds, particularly black + white ones that cuddle with you when winter's breath has finally left a permanent chill in the air.


While on the hunt for the perfect runner for a client I was excited to see the new Linus pattern from Stanton Carpet. I knew it was just the thing to add a subtle yet classic-with-a-twist pattern for a big impact on the stairs.

{photo credit Kate Nisbet Designs}

I love the movement, texture, and subtle stripe the pattern creates!

{photo credit Kate Nisbet Designs}